Check for a sticker first
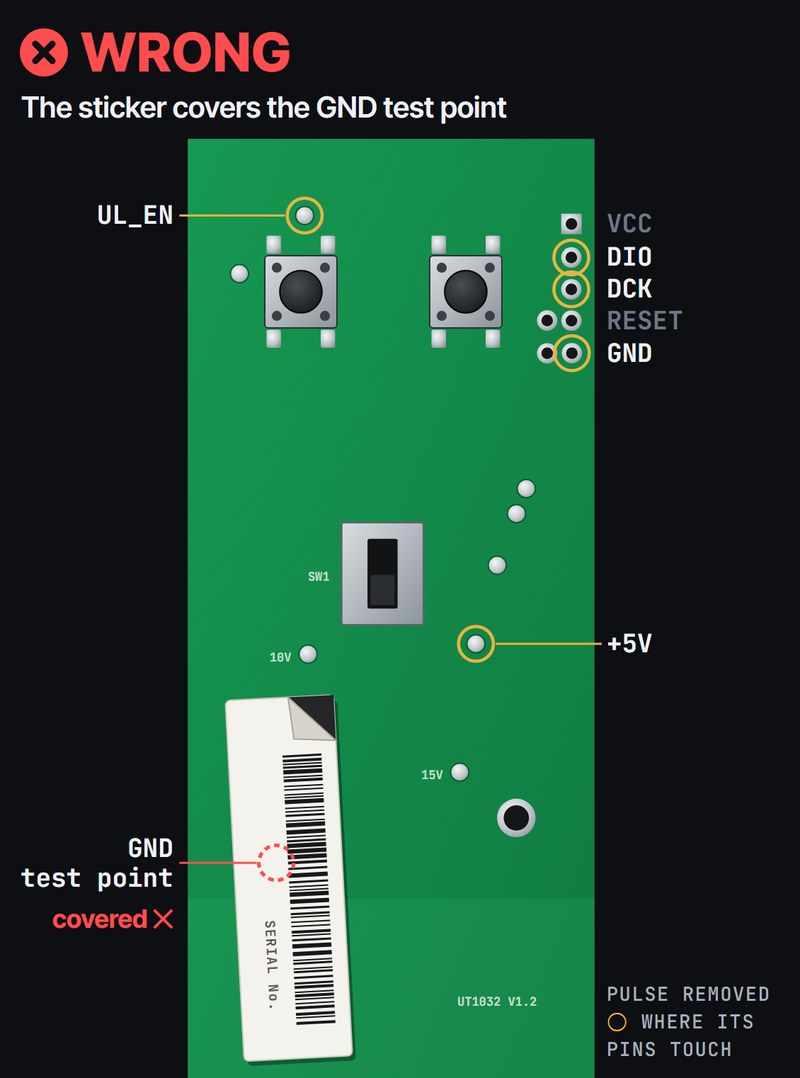
Many main boards have a white serial-number sticker (a barcode) on them, usually below the on/off switch. Sometimes it’s stuck right on top of one of the points the PULSE’s pins have to touch. The pins can’t reach the board through a sticker, so the PULSE gets no power: no green glow, and the phone never finds it.
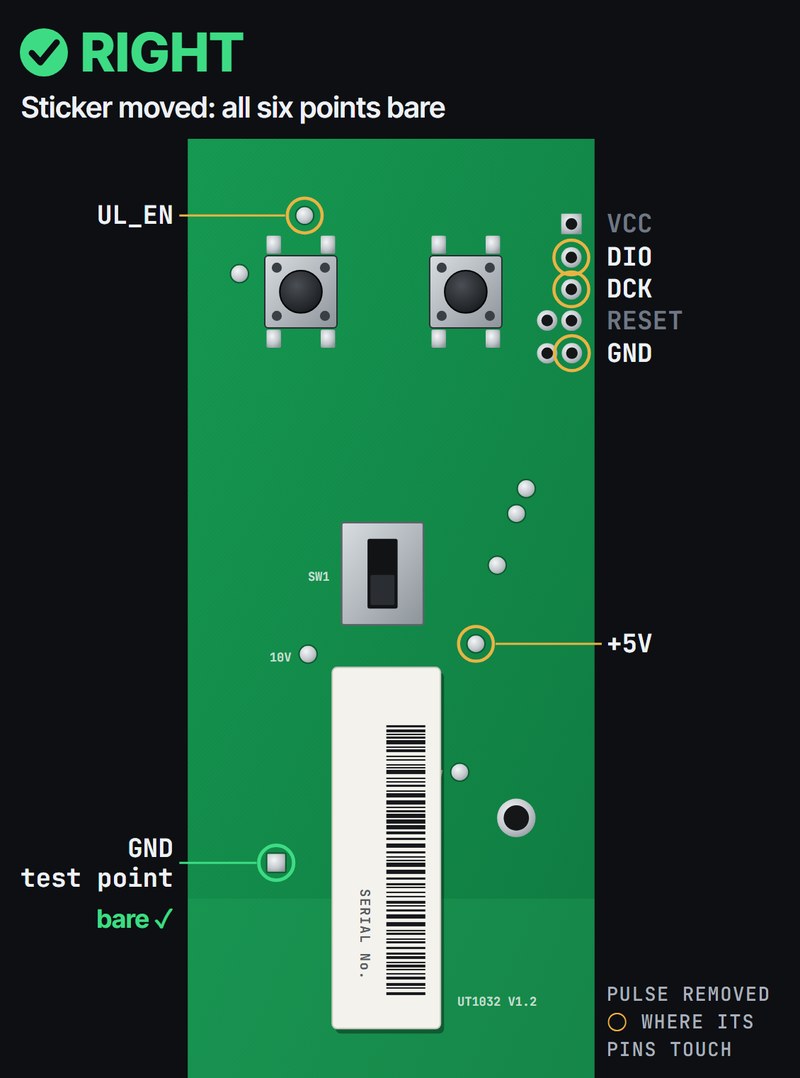
If the sticker covers any of the six points below, peel it back and stick it down somewhere else on the board, where it covers none of them.
With the cover off, the PULSE’s pins touch the main board at six points:
- three holes in the row next to the buttons: DIO, DCK and GND (the VCC and reset holes stay empty);
- a small pad just above the left-hand button (UL_EN);
- the +5V pad, below the switch and to the right;
- the ground (GND) test point, a small square pad below the switch on the left. The sticker usually sits right next to it, so check this one closely.
Moved the sticker? Put the PULSE back the usual way, clipped into the cover and closed straight down (install guide steps 8 to 10), then do the power check.
No sticker in the way and still no power? Check how the PULSE sits on the main board: one hole off and the pins miss.